Showing posts with label Western Pacific. Show all posts

Monday, February 15, 2021

A Life of Railroads

Bill Bowdidge

My father, Bill Bowdidge, died a few months ago.

When my grandfather died, my father stood up at the funeral, remarked that most people there had only seem small aspects of my grandfather’s life, and proceeded to just share the full story of my grandfather - tragedy, immigration, family, work, garden - to assembled friends and family. I remember sitting in the audience and being aware that some day I’d have to do the same.

I wasn’t able to give that eulogy for my father. COVID restrictions, elderly friends avoiding groups, and a majority of friends who have already passed away meant that we didn’t hold a funeral service for my father, and I wasn’t going to have the opportunity to share about my father’s life.

There’s a lot of ways I could tell his story outside of a funeral - share stories of his career with friends and co-workers, recount family stories, ask friends for hiking stories. This venue, though, might appreciate the important fact is that my father was a railroader. He worked for the Western Pacific when U.S. railroads were connected to every American business. He was a model railroader. He helped me catch the same bug, getting me interested in railroads, model building, electronics, and computers. If there’s a true story most suitable for this blog, my father’s story story is it.

The Bay Area, Orchards, and Canneries

My father was born in the Bay Area, child of a British immigrant and a rule-breaking Irish girl from San Francisco. My grandfather had emigrated from England to New Zealand in the 1920’s, and kept going ‘round the world. He ended up in California, met my grandmother, overstayed his visa, left, returned, and settled down for good in the San Francisco Bay area where he spent his career as a newspaper printer. My father grew up in San Leandro, playing around former orchards as suburbia invaded. My father had been interested in trains from the early days; British relatives got him hooked on trains by sending railway books from the UK and teaching him about the Flying Scotsman, the Great Western Railroad, and remote branch lines. Like many young boys growing up in the 30’s and 40’s, Lionel trains were the best toys to receive. To give him a place to set them up, my grandfather bought some recycled lumber left over from the 1939 Treasure Island World’s Fair and extended the garden shed to make a train room. My father eventually moved on to HO; I’ve got his Varney F7, custom painted and lettered for the Western Pacific.

His grandfather, on the ferry boat.

His grandfather was a ferry captain on San Francisco Bay, sailing auto ferries for the Southern Pacific Golden Gate ferry company. Occasionally, my grandmother would take my father over to San Francisco, and they’d try to time it to be on one of Grandpa’s vessels. My father remembered trips down to the engine room with the noise and the huge machines moving about ominously.

In the 1940’s and 1950’s, the Bay Area was still full of orchards and canneries. Bay Area kids knew that summer jobs at the cannery were always a good paying option. Dad spent multiple summers at Hunt’s and Del Monte’s canneries; his stories of those summers made me think about the cannery business as I was planning the Vasona Branch. One summer, he unloaded empty, loose cans from boxcars. He remembered using a long fork that could pick up a dozen cans at a time so they could be put on a conveyor heading into the warehouse. Another summer, he punched the piecework tickets for women filling cans with fruit. He also remembered an assignment watching an experimental automatic peach-splitting machine to make sure it would correctly center on the fold on the side of the peach. Dad also remembered the challenges of getting the popular jobs - connections and who you knew still mattered at the canneries. He’d remembered going to Del Monte and asking about jobs, only to be told he needed to be in the union. The union said they wouldn’t take him on unless he already had a job. Luckily, a neighbor who worked for Del Monte managed to get him in the door.

Dad went off to Cal Berkeley in 1948, commuting for the first few years, then finally living in Berkeley for the last year. He’d planned to be a Chemistry major, but problems understanding the thick accent of his Chemistry 1 professor convinced him it wasn’t the right path. He also met other railroad-crazy friends, going off on railroad club adventures on the Sacramento Northern and Northwestern Pacific with friends including Dudley Wesler, a prolific Bay Area railroad photographer and railfan. He ended up graduating in business administration. When he graduated, he did a stint working for Tidewater Oil. He found the job was “just an office job” which he found boring. He started looking around for alternatives. Railroads seemed exciting, but the “Friendly” SP wasn’t interested in him. Luckily, he’d done a report for a class on the Western Pacific Railroad. He contacted a rates and legal office manager he’d talked with, Tex Wandsworth, and got an offer to “join the railroad.”

Railroading And Two Martini Lunches

We usually think of railroading from the operations side: engineers, brakemen, folks working in the yard. Dad was always on the business side. His first job was as a clerk in an off-line sales office in Portland, Oregon. In those days, Portland was practically a foreign country. My grandmother wasn’t sure she’d see her son again when he got the job so far away. Traveling to see family involved two days of driving US99 in the days before freeways. “Bill and Kathy’s” restaurant in Dunnigan was his usual stop when heading back in his ’48 Chevrolet. But he liked the work, made life-long friends, and loved life in Portland

Oregon City excursion with social club.

Although he wasn’t on the WP, the small office meant he had a lot of freedom and different tasks. He helped an older gentleman arrange railroad tickets for a fraternal order’s tour of the East Coast by train, and got a commendation letter from the customer sent to his manager. He got to interact with the other railroads in Portland when tracing WP loads in their yards. One time, the Western Pacific had an order of new boxcars sent from Seattle; the cars had the new load restraining “DF” equipment. The San Francisco head office didn’t want to bring them to California empty, and asked the Portland office to find loads for them. My father contacted canneries in the Willamette Valley who were eager to use the cars for California-bound loads.

He also learned about railroad operations, albeit by visiting the railroads that had operations in town. From an April 1954 letter soon after he arrived:

“Today I went out to the Union Pacific’s Albina Yard. My business card really came in handy this time. The watchman was ready to kick me out of the yard until I gave him a card. Then he took me over to the yardmaster. He seemed pretty happy that I had enough interest in my job to come out there so he spent about an hour explaining how they switch cars. He gave me his card (and I gave him mine) and told me if he could ever be of any help to me to please call him. I am going to try to get to every yard in the city. I am on my own in the office usually + I get most of my help from the fellows in the other railroads [also in the American Bank Building]. They really have been a big help. I have been taking the tariffs home at night and studying them.”

When I was cleaning out my parents' house, I found that yardmaster's business card - he was "M.V. Newton", the general yardmaster. My father had saved that card (as well as cards for a bunch of the other clerks for other railroads clustered in the Pacific Building in Portland.

More importantly, my father learned about railroad rates, and started serving as a rate clerk, navigating all the strange Interstate Commerce Commission rules and regulations about how much railroads could charge. In those days, freight rates needed to be approved by the ICC, and all railroads needed to hold to the same prices for the same commodities. Classifying freight the wrong way would result in nasty fines to the railroad and the shipper, so correctly interpreting the rate books was a key task.

My dad managed to score some nice artifacts during his time in Portland. When he showed up in Portland in late 1952, there was a document in the trash describing a “manager’s tour” of the railroad to help sales agents in distant locations understand the WP infrastructure, and also the industrial parks they were hoping to develop. The local sales agent didn’t care about that document after the trip, but my dad saved it. I ended up scanning a copy when he showed it to me a few years ago.

Eventually, though, the position in Portland wasn’t the right place for an ambitious young man. Multiple folks told my dad that he’d better go elsewhere unless he planned on staying in Portland his whole career. Being in a job “on-line” was the only way to be taken seriously on the railroad. When a rate clerk job opened up in Sacramento, my father took it and moved south, leaving some happy memories in Portland and a disappointed girlfriend.

He arrived in Sacramento on a Friday in summer. He immediately went in to meet his manager, a curmudgeonly old railroader who warned him “Bowdidge, if you expect this to be like that sweet pension job you had in Portland, you’ve got another thing coming!” His desk, sitting in the corner of the depot looking out over the railroad tracks, was covered in amendments and insertions for the rate books; his predecessor had left three months before and the office was a mess. Dad didn’t like that; he went in Saturday morning, filed all the files, inserted the insertions, and got his desk cleared. On Monday morning, the salesmen were ecstatic - the office had been unorganized for so long. But quickly: “Bowdidge!” The rate clerk was a union job; someone had seen my father working on a weekend and filed a grievance.

Being on-line was more exciting; he could watch the WP trains pass his office window. He could see the cars he was filling. The Western Pacific carried lots of steel coil cars from Geneva Steel in Utah to the U.S. Steel rolling mill at Pittsburg, California. My dad remembered these cars were so heavy that they would shake the depot as they rolled by. Years later, on a family vacation in Sacramento, we went to the Old Spaghetti Factory in Sacramento, located in the former WP depot. Dad pointed out the location in the bar where his desk had been.

He also got to see the operations. WP’s dispatchers were also in the depot (or nearby). He saw their office a few times - older gentlemen chain-smoking as they avoided running trains into each other. Dad met Peter Josserand, one of the WP’s dispatchers and author of the “Rights of Trains”, the bible of dispatching practice. When I took a shift as train order operator at the La Mesa club’s Tehachapi layout, I brought my copy of “Rights of Trains” to read during the slack times and learned I could ask the dispatcher for a read back when I made extra copies of an order intended for all trains. The model dispatchers went through a lot less coffee and cigarettes than the prototype dispatchers.

In the late 1950’s, my father transferred to the WP headquarters on Mission Street in San Francisco. He’d always point out the building when we headed to San Francisco for Christmas shopping. He’d started out as a rate clerk in San Francisco. He also upgraded his role, becoming a salesman responsible for businesses in Oakland and San Francisco. Dad spent his days visiting WP shippers, encouraging sales, keeping up relationships and solving their recent problems. Encouraging shippers to use the WP was always a challenge; the SP dominated the California market, but Del Monte and other shippers would would send a token percentage of shipments by the WP just to make sure that the Southern Pacific wouldn’t take them for granted.

The ICC rules meant that railroads couldn’t compete on price, but instead had to work on service, so lunches at all the San Francisco restaurants - Schroeder’s, the World Trade Center, and Tadich’s Grill - was a key part of his job. Dad said he often got called on the carpet for not taking enough customers out to lunch during a month. Unlike what we might expect from Mad Men, two martini lunches weren’t common. My father remembers one shipper encouraging him for a second drink at a restaurant at Oakland’s waterfront, and my father remembered that wasn’t wasn’t a day to return to the office.

My father remembered white-collar San Francisco business well, even after he was working in the suburbs. When I was a teenager, he took me up on a “businessman’s lunch” day to see San Francisco at work, and made a point to take me to Schroeder’s and talk about how women hadn’t been allowed in the restaurant at lunch until 1970. He assumed that the working world I’d be in would likely be downtown, and likely suit-and-tie. Instead, my working world has always been suburban and much more t-shirt and jeans.

San Francisco’s “men-only” policy wasn’t only in the restaurants. Lela Paul was a longtime employee in the rate department at the WP. The WP didn’t normally hire women on the business side, but she’d gotten in the door during World War II and refused to leave quietly. My father remembered she got more than her usual share of abuse from her male co-workers and managers, but stayed her ground to keep her job.

With his mother on the Denver and Rio Grande narrow gauge.

Dad also enjoyed life as a single young businessman in San Francisco. He lived with a bunch of guys in “the bunkhouse”, an old house on Divisadero in the Richmond. He’d work late at the WP, eat at the communal table in family-style restaurants in North Beach like La Pantera. (He’d talk about how hard it was to cook at home as a single guy because all the meat markets would close at 6pm.) He hung out with a youth social group at Old St. Mary’s Church near San Francisco’s Chinatown, and went hiking and skiing with the crowd. One of the other hikers was a coffee broker who was getting frustrated with the corporate coffee business. In the mid-60’s, that fellow hiker, Al Peet, quit the broker job and opened his own coffee house in Berkeley where he roasted the beans the way he thought they should be roasted. My father remembered Al talking about growing up in Indonesia, and and life under Japanese occupation during World War II.

Among all the customers, my father visited the Oakland Army Terminal frequently. The base handled all material going to army bases in Asia, and received a lot of freight traffic. My father would drop in on the officer in charge of rail shipments in order to hear his problems, offer solutions, and hopefully pick up some WP-routed loads in the bargain. My father figured out that if he showed up at 10:00, the office waiting room was packed with vendors hoping to talk to the officer. Instead, my father would stop by the office at 7:30. The officer was in but there was no competition, so my father would get right in and would get extra time. In 1964, that officer gave my dad a hot tip - he’d be receiving a lot more traffic soon because of troops being sent to Vietnam. “Where’s that?” my father asked - Vietnam wasn’t a household name yet. After he visited the officer, he’d head over to the WP offices. He’d show up from his early-morning sales call just as the other salesmen arrived for coffee before beginning their own calls.

That Oakland Army Base transportation officer also encouraged my dad to take night school classes in order to get the ICC Practitioner certificate - giving him the right able to argue rate and tariff cases. It always seemed like halfway to being a lawyer for transportation rates. My dad took the classes at Golden Gate University and became an expert at rates and how to argue for exceptions. Dad was only one of maybe six people at WP with an ICC license - half were probably the company lawyers. It’s all a lost art now; all the ICC rules and tariffs disappeared during deregulation in the 1980’s.

Dad’s rate knowledge also helped romance. When my father was courting my mother, my grandparents probably had all the usual questions of whether this young man was suitable for their daughter. However, my grandmother had spent several years as the accountant for a vegetable packer, and she’d spent a lot of time working with the railroads to route cars to vegetable brokers back east. When she found out my father worked for the railroad and knew rates, she found him quite an acceptable son-in-law.

While Dad was in San Francisco, those steel coil cars came back into his life. He also was the salesman responsible for U.S. Steel. The steel company had an office in downtown San Francisco, and one of the staff there was the “traffic manager”, responsible for making sure the railroad cars of steel sheet arrived regularly at the Pittsburg mill. The WP had a dedicated set of short gondolas for the steel service; if there weren’t enough in Utah, then steel couldn’t be loaded. If there weren’t enough at the rolling mill, the plant would shut down, tin can production in the Bay Area would stop, and the Santa Clara Valley’s apricots wouldn’t be canned. Keeping the cars moving was essential. The U.S. Steel traffic manager in San Francisco kept tabs on all cars, and would complain to the WP if there were any hitches.

Sacramento Northern ferry, probably with one of the Cal railroad club's excursions.

The U.S. Steel rolling mill at Pittsburg wasn’t on the WP - it was actually on the Sacramento Northern’s trackage. The WP used to hand the cars over to the Sacramento Northern at Sacramento; they’d be pulled across the delta by the SN, and then taken by barge across the Sacramento River to Pittsburg. In 1951, though, a key Sacramento Northern trestle collapsed, severing the line from Sacramento to Oakland. The WP instead negotiated trackage rights with the Santa Fe to take WP trains on the ATSF tracks from Stockton to Pittsburg to serve the steel plant. It was a pricey move for a single shipper, but U.S. Steel was worth it.

One day, though, there were some car delays and the Pittsburg rolling mill began running low on coil steel. The U.S. Steel traffic manager demanded a special run to carry over a few cars of steel. It wasn’t one of the days for the WP run on the Santa Fe, so scheduling a special train would be expensive and troublesome. My dad took the traffic manager out to lunch, heard the problem, and noted that the steel was certainly going to be able to arrive the next day, and asked for U.S. Steel to wait a day for the steel. U.S. Steel agreed to the one day delay. My dad submitted reimbursement for lunch; his manager called it the “$500 lunch” because it saved WP so much expense and aggravation.

Full story here: The $500 Lunch

Damming Conduct

My father left the Western Pacific in 1966. The WP had its economic challenges as a small railroad. They’d had several years of potential mergers considered and dashed, first with the Santa Fe, then the Southern Pacific. The railroad was also a bit slow and stuck in its ways. He got a call looking for a traffic manager to handle rail and road shipments for Guy F. Atkinson, a large dam-and-freeway construction company, and he jumped at the offer. Many of his friends weren’t so lucky; many stayed in rate roles at either railroads or shippers; when deregulation hit, there no longer was a place for them.

A few years back, I was at one of the NMRA meets in Sacramento when I got talking with another attendee. He’d worked for a railroad - which one? WP! Oh, where did he work? San Francisco! Oh, did you know my father ? He was in the rate department. Yes, he certainly did remember my father - they worked in the same department! “Your dad made a smart move leaving the railroad. Your father’s problem at the WP was that he was smarter than everyone else there.” What more could a son want to hear?

Dad spent the rest of his career handling shipments of large construction equipment around the world. He sent construction equipment to build California freeways, Israeli airbases, Chilean and Canadian dams, Washington nuclear plants, and Arizona irrigation projects. He dealt with truckers carrying oversized loads, roll-on-roll-off ships hauling the largest bulldozers, and finding appropriate unloading spots for rail shipments. He also was responsible for all the personnel moves. He had a constant stream of moving company salesmen stopping by for a chat, and collected a pretty impressive collection of Allied, Mayflower, and United moving van models for his window sill. He’d constantly have a chain of frustrated spouses wondering where the moving van with their entire household was.

The railroad knowledge paid off multiple times in his career. When Guy F. Atkinson won the bid to build New Don Pedro Dam in 1967, Dad worked with the Sierra Railroad to find convenient spurs for unloading construction equipment. As part of that relationship, he manage to score tickets for several “shippers specials” on the railroad over the years, and we headed up to Jamestown several times for a ride on the railroad. He dealt with the Canadian Pacific to get equipment to Mica Dam above Revelstoke, B.C., and had a promotional photo of the spiral tunnels at Kicking Horse Pass in his office. As a kid, my knowledge of geography tended to be much better around the location of Atkinson job sites.

He also had some great adventures. Atkinson won a contract to build the Colbun dam in Chile, and he took multiple trips to plan sending equipment down to Chile, and bringing it back afterwards. He was particularly proud he’d practiced his Spanish enough to talk with some of the government officials to talk about importing rules, and so he was able to talk with the vendors. We’ve still got an advertising banner from one of the Chilean truckers that hung on the Atkinson loads. My father wanted to travel, but never did as much as he hoped. The multi-week trips to Chile were high points of his life. On the return from one trip, he stopped over in Peru and visited Machu Picchu, the city of the Incas high in the Andes.

When my father returned from that trip, he had such great memories; he’d tell us about all the people he’d worked with. He visited Santiago and the walked streets named after the great liberator of Chile, Bernardo O’Higgins. He enjoyed the stay in Talca, the town closest to the job site and remembered the hair-raising drive to Talca. He remembered business lunches in the port cities of Valparaiso and Concepcion. He remembered the gruff owner of one of the trucking companies, Señor Gordo. He struck up a friendship with the representative of the joint project’s local company, and saw more of Chile as a result.

He’d often tell about the great deal they’d gotten for the ship returning the construction equipment from Chile. They found a roll-on-roll-off ship that was taking cargo down to South America that was motivated to give a good deal to avoid coming back empty. Dad loaded millions of dollars worth of equipment on that random ship, though he had some nagging concerns that a random ship and a random captain might run off with the company’s bulldozers and trucks. When the ship reached the U.S., my father got a call from the import broker at the port. “I’m on the ship and sitting with the captain, but he won’t turn over the bills of lading.” The bills of lading were important; without them, the process of importing the equipment couldn’t begin. My father called the ship broker who put them in touch to understand what the hold-up was. “Mr. Bowdidge, what we have here is a lack of trust. The captain doesn’t trust that you’ll pay him, and you don’t trust him that he’ll provide the bills of lading.. I suggest you both trust each other a bit.” Both sides backed down, handed over paperwork, and the ships were unloaded without incident.

All his stories had been really positive at the time, ten years after the military coup had deposed Allende. In recent years, I heard the other side of those stories; he remembered one lunch with some vendors where one of the men was treated more distantly by the others. It turns out that man had been part of the right wing in Chile at the time of the coup. As the rest of the table sat silently, the man proudly shared stories of torturing dissidents.

When I asked folks from Atkinson for memories, they told me about all my father had done for the Chile project. Folks remembered the complications getting dump trailers re-imported into the U.S. The project manager for the Colbun project mentioned my father’s stories of Peru convinced them to also visit Machu Picchu. One person in the purchasing department remembered typing up my father’s yearly review. One of the questions was “what improvements could the company do to help you do your job better?” My father responded “Get out of the office more understand more about the job sites.” She was always impressed he had the courage to say that.

My dad's favorite story, though, was the time he had to ship a horse to Venezuela on short notice. He wrote up the story, which I'll share in its entirety:

The Day I Flew a Horse To Venezuela

One afternoon, Ron Shumway called me and asked how much it would cost to fly a horse to Venezuela. I was puzzled, but put some numbers together and got back to him.

A year or so later at about 4:00 pm on a Friday, [Atkinson Construction Company's president] George McCoy called and said the horse was a go. "What breed, where is he?" George says to call Sgt. Edney at the San Francisco Police Stables to get details.

I was going to wait until Monday, but something told me to call now. The sergeant says "I've been waiting for someone to call. I'm sure glad you called! The horse "Dudley Do Right" has to be in a parade in Caracas on October 14 (about four weeks away), and worse yet various tests are required for the Vetinary Export permit required to export a horse and take weeks to incubate and have to be sent to labs in Iowa, Kansas, and Southern California."

It seems George McCoy was on the San Francisco-Caracas Sister City Committee, who donated the horse to Caracas for crowd control. Atkinson was to pay the freight and my services were volunteered to ship the horse.

Well, it was a real scramble, but we got the horse there for the parade. I found a good freight forwarder in Long Island who made the arrangements and consolidated several horses to fill out the pallet and share the cost of the groom. Because of the short fuse, I started the horse towards Miami with a trucker specializing in horses before we had all the veterinary permits, the export and import permits which gave the forwarder gray hairs. "You don't do anything before all the permits are in hand" they kept telling me."

Nothing new. We always faced time constraints with Atkinson.

Making a Model Railroader

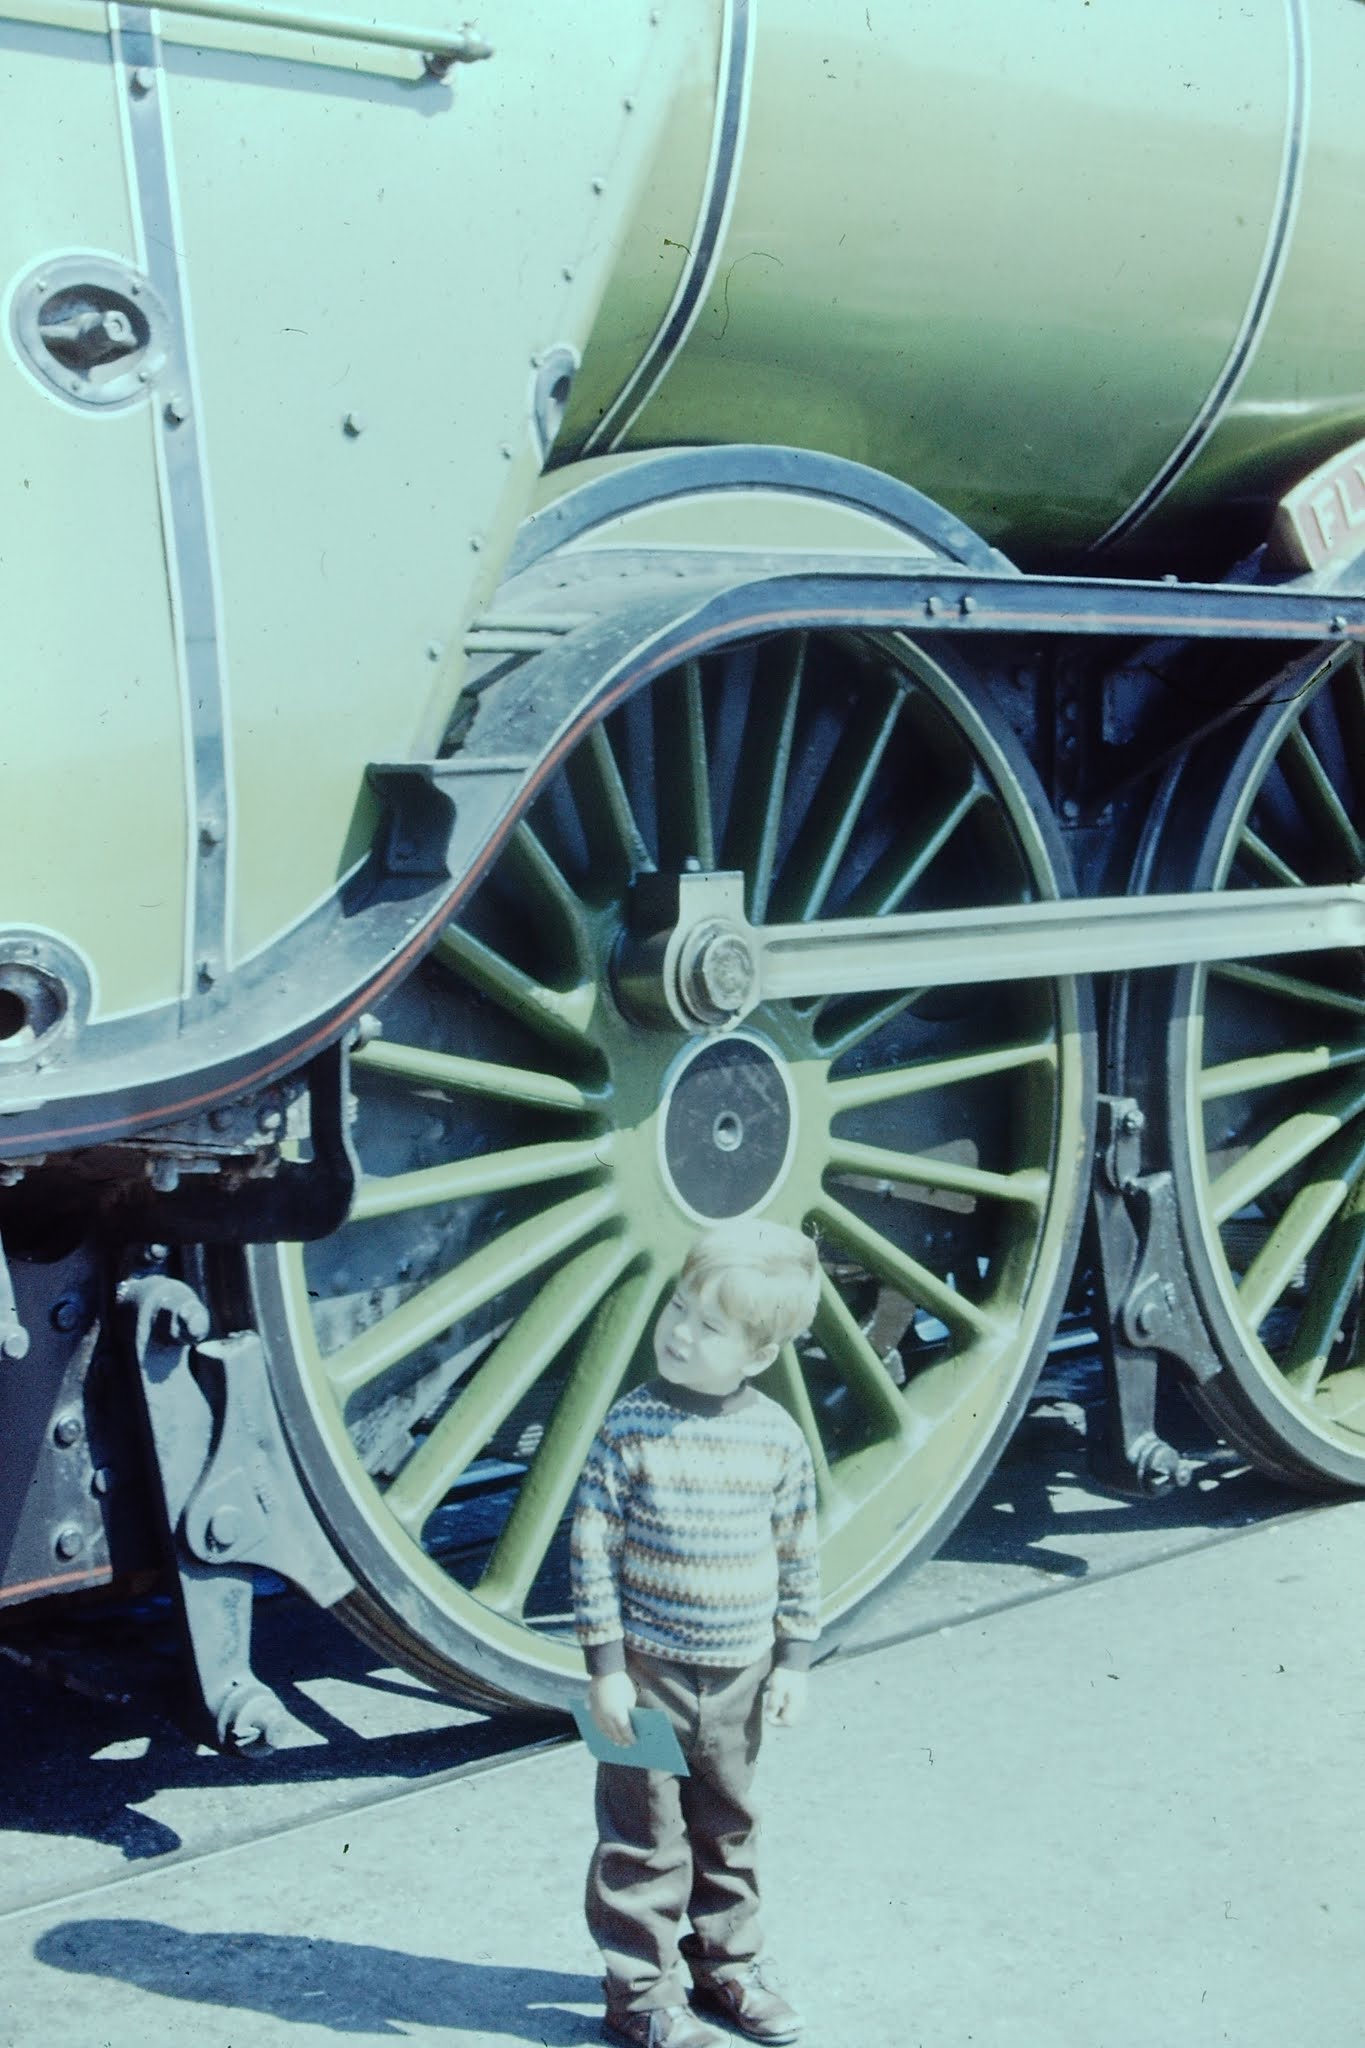
Author, in front of Flying Scotsman locomotive, San Francisco, 1970.

When I was growing up, I remember the train case on the wall containing the special models for my father - the Varney F7 he painted himself, his British and European trains he picked up on different visits, and the Pennsylvania GG-1 he got after an east coast trip. As soon as I was old enough for trains, he made sure I had a Lionel layout; it rolled under my bed, and I ran it incessantly. A neighbor had salvaged a former Lionel display layout from a store, and my dad saved the baseboard and restored a bunch of the signals. That got my dad hooked on trains again, and he passed it onto me.

The Lionel trains got me interested in electricity and electronics - understanding how to power the trains, and also how to power the accessories. I scotch taped wires under the layout to light up a station. We had a Lionel crossing signal that didn’t flash; my father talked with one of the electrical engineers at work, and came back with a handful of transistors and capacitors to make a flip-flop circuit - it seemed like magic to me. He also wanted to learn how to make the signals work, so he bought a copy of Linn Wescott’s venerable “How to wire your model railroad”. I quickly usurped it, and read the whole thing cover-to-cover. I tore it to pieces, learning about switches and relays, detection circuits, block power, and strange combinations of rotary switches to allow multiple trains to be controlled automatically. Dad also had bought a couple Model Railroaders, and eight year old me wore those magazines out as I read about zip texturing and brass locomotives.

Dad also gave me a lot of freedom. He showed me enough about tools to work safely, then turned me loose with his tools. I ended up building two model railroads, first in my bedroom, then re-using the old Lionel display layout for my larger HO layout in the garage. I made quite a mess there with scenery and wiring. After reading about the Sunset Valley’s engine terminal in Model Railroader (thanks, home town public library, for having the MR subscription!), I decide to build a 1x4 foot extension for a diesel engine terminal. My father stopped me with that attempt at usurping space, and highlighted the extension had to be removable and moved out of the way when I wasn’t operated. He regularly took me down to Trains-Nothing-But-Trains in San Mateo as soon as I was doing HO modeling. When he took me to the dentist, we always made a stop at Berkeley Hardware for a boxcar - some of those kits are still on the layout.

Yosemite, with author's grandmother. My dad remembers vacation trips to Yosemite with me and my sister as highlights of his life.

All that shaped who I was - I got interested in electricity, electronics, and digital logic. I got comfortable with tools early, and stole a bunch of my dad’s for my tool box. (Somewhere, I’ve still got side cutters I liberated years ago, as well as some jeweler’s screwdrivers from his tool box.) The model railroad electronics got me interested in taking electronics classes in high school, which taught me how to scavenge components from the junked electronics at the back of the lab.

Dad also encouraged my interest in computers. I’d used some of the early microcomputers at school. When Dad took a computer class at the local junior college, I’d go with him to evenings in the computer lab, and would write my own programs on his account. The instructor would delete programs unrelated to the class because of disk space limitations, so I learned how to use the teletype and punch out my program listing so I could reload it the next weekend. (Meanwhile, Dad wrote his own programs to estimate costs to ship large objects via oceangoing ships.) When a friend got a TRS-80, I ended up going to visit him but would ignore him as I got caught up in programming his computer. His mother “suggested” that maybe I should have a computer of my own. My mother and father managed to get me a TRS-80. When I started learning to drive, Strawflower Electronics in Half Moon Bay was a common destination because they sold all the TRS-80 games I couldn’t get in Radio Shack stores. All that experience with early microcomputers got me into computer science, and also gave me a chance to learn about microprocessors and electronics. I’m now working for a company making computer chips - insanely complex microprocessors - but the model railroading gave me an appreciation of electronics and a decent knowledge of what’s happening down at the computer chip level to keep up with the hardware guys. The Kalmbach books on wiring the model railroad and assembling electronics is still helping me forty years later.

A Grown-up Model Railroader

Dad’s always been supportive and appreciative for the model railroad, though I suspect I took it much more seriously than he ever would. He liked what I was building, but his interest was still in the models he’d collected and their history - his Lionel trains from his youth, the HO models he’d built, the european models he picked up on vacation, and the occasional models he’d pick up because they caught his fancy. He occasionally passed on some of his older models to me. Somewhere, I’ve got one of his 1940’s “Crazy Crystals” refrigerator cars.

He liked passing on stories, and indulged me when I’d push for operational details about the Western Pacific. He tended to remember more about the personalities than the day-to-day operations. He didn’t know much about how WP’s Sacramento R Street freight house handled traffic, but he still remembered the name of the guy ran the place. He didn’t necessarily know about how trains were routed, but could pull out an old rate book and explain how to argue about how to disassemble dump trailers to get a better rate.

Mom and Dad, Vista-dome, over Donner Summit

Back in 2006, my wife and I wanted to do something special for my parents, and found out about a private car group trip to Reno and back over Presidents’ Day weekend. The group had assembled three private cars - a streamlined dining car and a dome car, and Beebe and Clegg’s “Virginia City” observation car, all to be placed on the rear of Amtrak's California Zephyr. We picked my parents up, took them to Emeryville, jumped on the train, and crossed the Sierras. We chose a good weekend - we crossed the Sierras as a big snowstorm hit, and got to watch the snow pile up as we passed the traffic jams on I-80. It was an impressive ride, both for getting to sit in a real dome car, and getting to watch a real snowstorm crossing the Sierras.

The Virginia City on the back of the California Zephyr.

The trip also spurred memories from my parents. My parents got married just before my dad left the WP, and he made a point to arrange a trip by the California Zephyr to Salt Lake City and back. They may have ridden in the cars we took that trip to Reno in. We heard more stories of that trip as we sat in the bar at the Nugget casino - the Italian restaurant owner slipping them wine in Salt Lake City, newlyweds in a sleeping compartment, finding others with our rare last name in the Utah phone book. On the way back, our Amtrak train was delayed because of a broken rail somewhere out in Nevada. Our assembled group stood trackside at the Sparks station waiting for the train until the organizers managed to hire a bus to get us all to the warmth of the Reno Amtrak station. While we stood out there, snow flurries started falling - something I’d first seen during a few years living out on the east coast. My mom had never seen snow flurries before; she'd spent her life in temperate California.

My father, by contrast, had been a skier and interested in the outdoors, so snow wasn't so unusual for him. Somewhere, he's got his record of climbing Mount Hood during his days in Portland. A few years ago, I opened one of the Southern Pacific Technical and Historical Society's magazines to find an article on the special trains that would take skiers up to Norden Summit and Sugar Bowl during the season. In the front and center, there was my dad, caught in a publicity photo. He'd also made the trip up to the 1960 Winter Olympics at Squaw Valley. In one of his few recorded cases of lawlessness, my dad paired up with friends-of-friends who managed to sneak into the US-USSR hockey match, the hottest ticket of the Olympics.

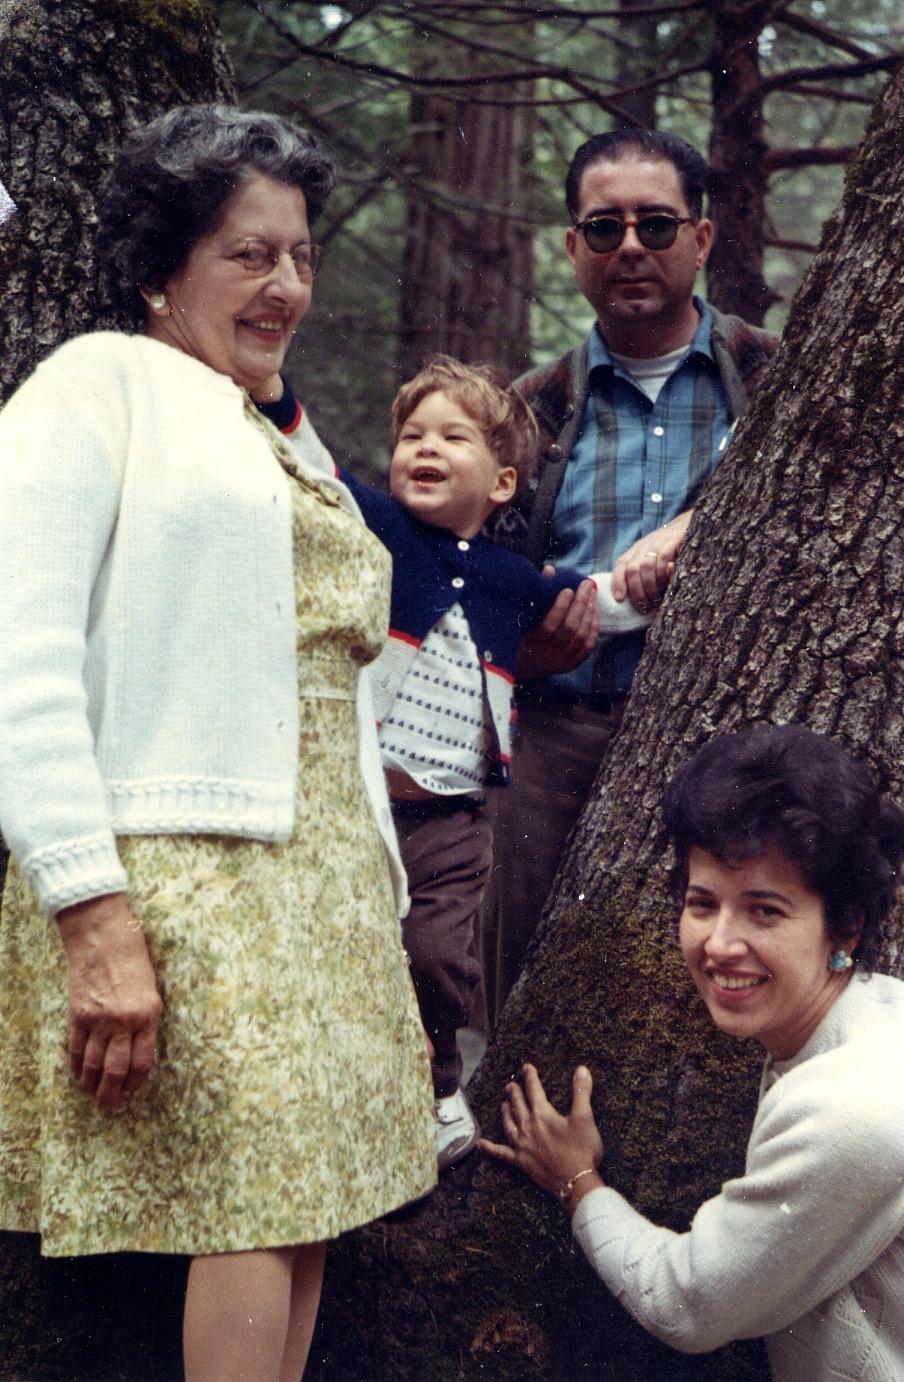
My father's family including his not-yet-train-crazy grandson.

Age slowed my dad down a lot over the last ten years. We’d occasionally go to train swap meets, and we’d talk a bunch about trains or about his time at the WP. When my nephew got to five years old, Dad and I pulled out our saved Lionel trains and cleaned them up for his grandson. We’re not sure he caught the train bug. My nephew wasn’t too interested a few years ago, but he set up a “sushi train” a couple weeks back in the style of a sushi boat restaurant he missed visiting. Dad heard my updates on the Vasona Branch, but hadn’t been down here for a few years because of mobility issues. As I mentioned a few months ago, the Vasona Branch got photographed for the NMRA Magazine in preparation for the NMRA National Convention in Santa Clara. The magazine issue with my layout got sent out in October. I sent Dad a copy when he was in nursing care at the end; he got to see how he’d encouraged and inspired me, and what I’d managed to build. He proudly showed it off to the caregivers.

My father saw a lot during his life. He saw San Francisco before bridges and a city where men wore hats and women gloves. He saw the Bay Area change from industrial and agricultural to high-tech and suburban. He saw the changes in transportation with the decline of the railroads, air freight, and deregulation changes. He saw entire job categories disappear and appear. He saw early computers at Berkeley and the WP (but chose not to pursue that side of the business.) He still loved using his Macintosh to read the world’s newspapers, but the iPad was a little too newfangled for him. He saw Europe and South America, and remembered all his travel fondly. He raised a family, and saw his grandson become an energetic young man.

He also helped his son become train-crazy, and inadvertently encouraged me in what eventually became my career.

I’ll miss you, Dad.


Original story extended with the "Day I Flew a Horse to Venezuela" story.

Friday, May 8, 2020

What This Layout Really Needs is a Dutch Functionalist Signal Box

The Conundrum

Well, if I needed proof that I’m a structure modeler, not a freight car modeler, I’ve got proof.

I’ve talked in the past about my rules for structures: build only appropriate buildings that will fit on the layout. I’ve got a small model railroad. I don’t need bunch of models I can’t fit on the railroad, whether structures, freight cars, or locomotives. I want to model historical locations, so I don’t need models that aren’t appropriate for 1930’s San Jose. That means no generic kits, and no models inappropriate for the era or the location. I can’t always build what seems like fun. While there were lots of photogenic art deco, modernist, or mission-style buildings around San Jose, they weren’t always along the railroad tracks. My model railroad shows the back side of the old warehouses and canneries, not the attractive downtowns.

Even with that rule, I’ve got lots of interesting structures for inspiration, all clustered in a folder labeled “Inspiration”: a 1920’s car hop restaurant in LA, that pocket gas station in Hollywood next to D.W. Griffith's movie studio, the old freight house at San Jose, a bit of the facade of Golden Gate Packing in San Jose, a moorish revival storefront. They catch my eye, they seem interesting as models, they’d fit on the layout, and they’d fit the era and the location. I keep thinking any of these would be fun; sometimes I might even pull one out as a potential project.

No matter how earnest I sound, I’ve broken the structure rule occasionally. I built one of the classic Fine Scale Miniatures kits just to see what was special about them. The model's much-complimented instructions on weathering the building taught me some handy new tricks. A while back, I showed the 3d-printed model of that 1915 Hollywood gas station. I don’t have a place for it on the layout now, but I liked the look, and I knew it had potential to be on the layout. But other than a few examples, I don’t build inappropriate structures. Nope. If I’m building it, it better have a place on the layout.

But hey, this hobby’s about having fun, and sometimes that means breaking our well-thought out rules to do something wacky.

As part of entertainment during the current shelter-in-place, I’ve been following a bunch of European modelers. One, Tim Dunn, had been publicizing the Twitter Model Train Show, an online event to substitute for a cancelled model railway show in London in March. Tim’s also a broadcaster and is currently doing a TV series on railway architecture on Britain’s equivalent of the History Channel. For one episode, he mentioned the work of Sybold van Ravesteyn, a Dutch architect well-known for his modernist buildings. He shared a few photos on Twitter, including this photo of a very non-traditional switch tower / signal box:

And just like that, I’ll toss away all my principles, and start building a model that doesn’t match my era, my location, and won’t fit on my layout. It’s a pretty sweet model, though!

(For more on van Ravesteyn, read the detours.eu article on his projects.)

The Prototype

van Ravesteyn’s prototype signal box was in Utrecht in the Netherlands, between Rotterdam and Amsterdam. It's an eye-catching structure with sweeping curves, those odd round windows, and the notched roof looking a bit like Don Quixote's shaving bowl hat, all built from concrete. It's like some sort of modernist aerie that might fit well in the hills of Los Angeles, or a couple of brutalist college campuses I can think about.

Yeah, I had to build a model of it.

A bit of research told me more of the history. The signal box was built as part of a revamp of Utrecht’s central station in 1937 and 1938. Similar signal boxes sat on the north and south ends of the station, but the surviving photos are for the signal box on the north end, just where the Leideveer underpass dives under the railroad lines. The signal boxes were designed for electric interlocking machines, with the operators on the top floor, an equipment room in a middle level, and the bulk of the building perched on top of a 15 foot high concrete shaft. The real signal box was never actually used "because of World War II", though that doesn't say whether Utrecht was damaged, if the line didn't get enough traffic to require the interlocking, or if the building was just impractical. It appears the building was a residence for a few years, but torn down in the 1950’s. Some online photos show the tenants on the stairs up to the signal box.

The Model

I’d initially thought of 3d printing this model in order to reproduce the curves and the round windows. However, it’s a bit of a waste to go straight to 3d here. The switch tower would take a fair amount of resin to print - probably the equivalent of a couple freight cars, and I’d require a couple tries to print it reliably. 3d printing’s also best for a model that’s going to be made multiple times. This switch tower’s a weekend boondoggle; I don’t even need one, so 3d modeling for multiple is overkill.

I still did a 3d model in SketchUp to figure out the measurements. I created the 3d model by studying a bunch of photos online, and estimating dimensions from the spacing between tracks, size of windows, etc.

For most traditional buildings, figuring out how to build a model isn’t that hard: lay out the walls, cut holes for window and door castings, glue walls together, add a roof. I learned all this from kits I built in high school, and models I’ve scratch built and kit bashed ever since. The curved lines of the signal box didn’t suggest an obvious way to build. I ended up using a model airplane-like approach, with forms supporting a skin.

I drew out the end shape on 0.060” styrene sheet (cheap and plentiful in large sheets from Tap Plastics!), cut out two pieces to match the signal box’s silhouette, and drilled holes for the round windows in the equipment room. I then added spacers with 1/8” x 1/4” styrene rod to hold the two ends out the appropriate 12 scale feet apart. (The thick styrene rod is available from Evergreen Scale Models, just like your scale 2x6 strips and clapboard siding. The bigger pieces always seem like an extravagance compared with plexiglas or wood scraps. However, the styrene rod is easy to work with - just score and snap, same as the thinner styrene - and easy to glue.) I also added 0.125” square styrene along the edges of the pieces as a gluing surface.

Once I had the rough form, I cut out 0.020” styrene sheet for the curved walls, and carefully bent them to match the curve of the walls. A bunch of rubber bands and clamps held everything in place until the plastic glue dried. I sanded the corners so they were a bit less sharp, added filler, and primed the whole model to double-check the surface didn’t have flaws. I built the roof similarly - two sheets of 0.062” styrene for the flat roof with the concave notch, and a half-barrel roof made from half-circle forms with thin sheet over the top. One important step was gluing some 8-32 nuts into the base of the model. This is a really top-heavy model that won’t stand on its own, so I needed to secure it to a base just so I could paint it and work on it without the signal box falling over.

Once the rough walls were formed, I added more of the structural details - the entry platform, and the horizontal table outside the observation windows, all cut from styrene sheet. I used styrene strip to frame up the observation windows, and a platform for the roof. I primed and painted the model white, and added some weathering to make the curves more obvious.

I also made one bad move: I tried to add some texture to the walls to better look like concrete. The "pumice gel" I'd used to simulate stucco looked way too rough, and I spent a couple hours scrubbing and scraping the texture off so the model would look "cleaner".

The steps and handrails came from Central Valley’s “Fence and Railings” and “Steps and Ladders” packs. I couldn’t reproduce the curved railings by the entrance to the signal box, so for now the model has some unfortunate straight railings. I’ll try later to do a more accurate set of railings.

So where’s the completed model going to go? It’s not appropriate for the Vasona Branch. The WP’s West San Jose tower already has an accurate model. Even if I wanted to imagine that a modernist switch tower might have ended up at the location, economics and the unfashionable location suggested that there was no way a fancy switch tower ever would have been at the location. WP shut down the tower by the 1930’s anyway, so it's unlikely they would have spent money for a modernist jewel box out behind the Del Monte Cannery. Instead, my little Utrecht tower will probably be going to my desk at work just so I’ve got something railroad-related to be thinking about in between tasks.

I’ve got a rule: I only build appropriate models that will fit on the layout. Except when I don’t. The Utrecht signal box was a break-the-rules, fun, more-than-a-weekend project. The signal box wasn’t appropriate for my 1930’s San Jose layout, nor does it give me a chance to explore my interest in California history. However, this little modernist signal box from half a world away does capture my interest in modern architecture, and gave me a chance to try some unusual techniques in styrene. I imagine I could have learned the same lessons in plastic by scratch building a Vanderbilt tender, or a passenger car. But I like buildings, and so if I was going to do a project just for fun, it’s pretty obvious it would have been a modernist little structure model.


Thanks to Tim Dunn for sharing the original picture and inspiring me to build this project. Arjan den Boer's article on van Sybold van Ravesteyn gave more detail on the arrangement of the signal box, and the architect's evolution of style. Thanks to all the kit manufacturers who gave me enough model building skills so I could knock off this model in a couple of long days.

Saturday, February 23, 2019

Installing the Interlocking Machine at West San Jose

I'd shown the interlocking machine for the WP crossing a couple posts back. Now that I've shared it, it's given me a good kick-in-the-butt to actually install it on the layout. After a couple of weekend work sessions, I'm proud to say it's installed now. See the video above to see it in action, or read on and learn some of the details about installing it.

I've argued I need the interlocking because crews will otherwise forget the crossing is there. In case you doubt it, here's a photo from an early op session showing someone dropping cars directly across the crossing.

And finally, some details about the scene:

The Derails

The West San Jose tower was a mechanical interlocking - that is, the levers on the interlocking machine moved piping which would cause switches, derails, and signals to change position and state. Seeing the Barriger photo of the crossing from the 1930's, I really wanted to model the control devices - the derails that would push cars off the tracks, and the movable rods that would move a derail out of the way so a train could pass.

I'd thought about doing something physical to block the tracks, but the alternatives I thought about, such adding a switch point in the track or dropping a derailing device on the rail, seemed both fragile and troublesome. I chose to do something less prototypical, embedding an LED between ties. The LED glows red if the derail is set, encouraging crews not to roll through. The lights don't force crews to deal with the interlocking, but they're at least an encouragement.

I'd also considered laying out the actual rodding to control the signals and derails. That idea also ended pretty quickly; I realized most solutions wouldn't be able to stand up to the aggressive track cleaning needed for a garage layout. I'd considered using something substantial such as piano wire for the rodding, but immediately had thoughts of poking a bit of rod straight through one finger. (Perhaps I could bend right angles at each end of a section of pipe so the ends are firmly in the roadbed?) For now, there will be no piping.

The Signals

The real West San Jose crossing would have been protected by tall semaphore signals - one set of signals close to the crossing, and another about a mile back. Semaphore signals wouldn't survive last long at this point on the model railroad. The area around Auzerais Street requires a lot of reaching in to couple and uncouple cars, and the low upper deck means operators need to reach right in. Rather than watch semaphores get destroyed each session, I decided to use dwarf signals at the crossing. Like all modelers, I've usually got some interesting stuff in the scrap box for a project. The scrap box held some dwarf signal castings I'd probably bought at the Trains-Nothing-But-Trains closing sale back in 1983, but I only had two of those left.

Instead, I fell back on my favorite crutch - the 3d printer. With about an hour of work, I'd sketched up a signal and had it printing on the 3d printer. I needed to refine the design widen the holes so they'd fit my chosen LEDs, but still had usable signals within a day of changing my plan. The design may seem a bit simple, but it's got all the same detail that my 1970's era white metal signal had... and I don't need to run to the hobby store to get more.

The Switches

The interlocking machine controls a pair of track switches for the interchange track between the WP and SP. (Full disclosure: there was no such track here. When the SP and WP interchanged cars, they did so at a small yard along South Fourth Street. Switching interest won out over accurate trackage.) Like all switches on my layout, I use Tortoise switch machines to control them, both so crews don't need to reach into the scene to throw switches and so I've got electrical contacts to avoid dead frogs. The Tortoises work by reversing polarity, so the switches on the fascia are DPDT switches wired as reversing switches. That won't work with the Modratec contacts - it provides SPDT contacts for each lever.

Instead, I replaced the Tortoises with the the MP5 switch motors I'd used on the Market Street modular layout. The switch machines can be controlled via SPDT contacts. They're also easier to install - the position of the throw wire can be adjusted after the switch machine is screwed onto the layout. The MP5s do use tiny screws for mounting, but I've worked around this by mounting them to thin plywood with #2 screws at the workbench, then using larger screws to attach the plywood to the benchwork.

The Lights

The area around the Western Pacific crossing hasn't gotten a lot of attention; apart from a coat of paint soon after the track was laid, there's been little work on the area for the last... oh, ten years. I did build a model of Western Pacific's tower years ago.

Putting in the interlocking also forced me to do a few other jobs - I added dirt to hide the bare homasote, glued down a fence leading to the Del Monte cannery. I also ended up improving the lighting. When I started on the Vasona Branch, I used under-the-counter fluorescent fixtures. They worked ok, but there wasn't always enough space for the twenty inch long fixtures. I also was always a little hesitant about threading 120 volt wire through the layout just in case the wrong wire got chafed or cut. When I'd checked out LED strip lighting years ago, I found the lights weren't really bright enough for layout lighting, and the printed circuit carriers weren't easy to mount.

Last year, I'd spotted some cool LED units in Fry's electronics components aisle. These were 12 volt LED modules, with white LEDs on a plastic carrier. At $1.50 a unit, they were too pricey for an entire layout. Searching on eBay, however, I found the same modules were often used for hollow sign lighting, and that I could buy strips of a hundred of these lights for almost nothing. These are still available on Ebay (like this - search for "LED module 5050" (5050 is the part number for the bright white LEDs) and there's some that exactly match mine, and a lot of other similar fixtures. I like the waterproof ones; they've got sealed packages. I use 12 volt power supplies for laptops to power them - they're cheap ($10), come with a cord and plug, and don't cover up outlets like wall warts.

Next step: get some operators to actually test out the interlocking!

Sunday, January 6, 2019

Building an Interlocking Machine For West San Jose Tower

As I’ve mentioned before, I like model railroading as a hobby because of the mix of projects I can do. I’ve got a friend who’s big into wargaming figures. His photos of some of his painted miniatures shows great work, but I always wonder “what does he do when he doesn’t want to paint?” Luckily, I’ve got no such problem; when I'm tired of one kind of project, I move on to another. Lots of projects go unfinished because I’m not quite in the mindset to spend time on them. Some times the project just gets delayed, and sometimes it gets rethought. I’ll switch and do something else for a while, and eventually I’ll come back. Maybe I’ll do the project as I originally conceived it; other times, I’ll throw my old ideas away and go in a completely different direction.

Take the Western Pacific crossing on my layout, for example. The WP crossing was a key part of my track plan, not because it was an active part of switching the canneries, but because it both helped set the location, and because it tied my railroad to the larger world. I had plans years ago for how I wanted to build it, but those plans never worked out. A while back, I rethought what I was going… and ended up with a new plan that sounds like much more fun.

The Crossing as Model

The crossing of the Western Pacific and Southern Pacific tracks in West San Jose isn’t much to see - just a set of tracks crossing between the Del Monte cannery and the Standard Oil spur. There’s an interchange track that gets a couple cars switched every operating session. I built a model of the WP’s 1920’s era switch tower years back, and I keep having ideas of putting the Virden Cannery next to the tracks, just like in real life. However, for the operating crews, there’s just not much there. Littering freight cars across the crossing when switching Del Monte is quite a common occurrence, and would have infuriated the real tower man for the Western Pacific Railroad on the real railroad.

I’d had ideas to make crews better respect the crossing. Somewhere around here, there’s an Arduino with a sound card to control some animation. It would play a soundtrack occasionally - a factory whistle, some cars going by, a far away whistle, and finally the sound of a WP train approaching. Some nearby signals would change to red (to announce the arrival of the train), and LEDs in the roadbed would flash as the phantom train passed. If that wouldn’t keep crews from blocking the tracks, nothing would.

The project that didn't work out.

The plans never quite worked out; I didn’t have a place for the speakers and was never happy with the soundtrack. The idea of making the crossing obvious and important during operating sessions did linger.

History of the WP Crossing

When the Western Pacific was built in the 1910’s, the Southern Pacific already had tracks in all the obvious locations around the Santa Clara Valley. The potential business from San Jose’s fruit industry encouraged the railroad to find a way to get past the SP’s tracks. The WP’s line from Fremont and Niles to San Jose had to parallel the SP for much of its length, then swing far south of San Jose only to approach the city from the south. The route required crossings at Niles Junction, at the crossing of the SP’s Coast Line at Valbrick, and a final crossing of the San Jose - Los Gatos branch at West San Jose.

The tower - West San Jose to SP, and Tower 17 to the WP, was built in 1922. The railroad signalling trade rag commented on the construction: a Saxby and Farmer interlocking machine controlled the semaphores, with 20 levers controlling signals and switches. The crossing was quite substantial, with WP’s branch line crossing the SP’s main line and two drill tracks right in the middle of the cannery area. Like all railroad towers, the second railroad to arrive at a place paid for it all - the track crossing, the tower, and staffing the tower. The WP never got the traffic it expected from the San Jose branch, and had little interest in staffing the tower on an unused branch line. By 1938, the tower was out of use. In later years, WP trains had to stop and check the SP wasn’t coming before dashing across.

James Barriger got a decent photo of the area around the tower in the 1930’s, capturing an SP switcher right behind the Virden Cannery. Although he didn’t capture the tower, he did show the trenches for pipe rods controlling derails on the drill tracks.

The Interlocking

On a railroad, a switch tower is a manned location that controls where several tracks come together, and where the track, switches, and signals are controlled to ensure safety and minimal delays. There’s usually a person present; he sets switches and signals to allow trains to safely move through the section of track based on train schedules, dispatcher orders, and the arrival of trains. Controlling those tracks is often done by an “interlocking machine” - a mechanical computer that ensures only non-conflicting routes can be set up through the stretch of track it controls. Interlocking machines usually have levers that control switches and signals, one lever per device. For the WP crossing, that means that the signals, switches, and derails can be arranged to let an SP train to cross the WP tracks, or allow a WP train to cross the SP tracks, but not both. (It also enforces safe order - the tower man can’t set a signal to green unless the switches and derails on the through route are set correctly, and derails on the crossing track are locked down.) Interlocking machines use a set of sliding bars connected to multiple levers to ensure that if lever A is thrown, lever B cannot be thrown.

As mentioned, the WP tower’s interlocking machine had twenty levers - were there really that many things to control? From various sources, we can guess what the 20 levers in the Saxby and Farmer machine controlled. The Barriger photograph shows piping for derails, suggesting all the tracks had devices to stop a runaway car on a track that wasn’t expecting a train. Railroad valuation map shows that the SP had distant (one mile before) and nearby signals closer to the crossing. Track diagrams show one mainline track and two drill tracks on the SP to handle switching the canneries in the area. One likely guess at the purpose of the levers would be one derail, one local signal, and one distant signal on the SP and WP main tracks in each direction (3 * 4 = 12 levers) + a signal and derail on each SP drill track in each direction (2 * 4 = 8) for a total of 20 levers - just what the trade rag says.

Locking bars, tappets, and tappet blades on the interlocking machine at Santa Clara tower. Chuck's photo.

So it would be neat if I could actually model the interlocking machinery, and give my operators an appreciation for everything involved with the tower - the rules about how train crews got permission to cross the diamond, the need to communicate to the tower man where they wanted to go, and the actions the tower man needed to do to line up the crossing. That means I need to build an interlocking machine - not a standard kit at my hobby shop. I’ve seen articles on how to make an interlocking. Model Railroader had a set of articles by Paul Larson and Gorden Odegard in the January-June 1961 issues of Model Railroader, but it wasn’t quite a step-by-step project, and the suggestion that the authors needed to build a wooden mock-up beforehand to test out the logic suggested it wasn’t a project for the faint-hearted.

Building a Modratec Interlocking Machine

Luckily, there’s folks who can help. Modratec, in Australia, sells kits for making a working interlocking. The price isn’t quite an impulse buy - about US$225 for 12 levers and electrical contacts, but it’s a pretty great little kit. To get an interlocking kit, you download their SigScribe4 software for setting up the constraints, define out how you want the levers to work, then mail off the interlocking details. You’ll get a kit back - all machined and ready to be bolted together, with a bit of metalwork to set the locking machinery to match your intent. I’d been considering this kit for a few years; I’d tried a couple times to get started, but never quite got it. A couple years back, I finally took the time to understand the software well enough to describe West San Jose Tower. The interlocking turned out really nice, and gave me a much better understanding of how real interlocking machines work.

Designing the Interlocking

The biggest challenge was just getting the interlocking designed. It took me several tries over a couple years to figure out the SigScribe software to get a working interlocking. Running through the tutorials multiple times helped. Once I understood the software, designing a new interlocking for my Market Street layout took only an hour. Don’t be surprised if it feels cryptic, or if you find yourself starting from scratch multiple times.

The general steps are:

  • Research your prototype to understand how the interlocking may have been laid out. Decide on signals, switches, and derails.
  • Draw the track plan in SigScribe, mark the location of signals and switches, and describe the configuration of each signal.
  • Associate levers with signal blades or switches.
  • Define a route for each signal lever indicating what switches must be set (or locked) to allow a train to proceed through safely.

Planning the interlocking involves a bunch of choices - how far out does the interlocking go? Where did the prototype have signals? What additional safety is required, such as derails or pointing an incorrectly-proceeding train away from active routes? Doing a bit of research helps you lock down what you’re building.

Track diagram for the West San Jose interlocking I built.

For the West San Jose tower, I started by looking at photos and other documents. The Barriger photos showed that the interlocking had derails to keep an incorrectly moving train away from the crossing; representing these adds a bunch of extra levers to the interlocking, and reminds operators about all the extra machinery needed to protect the crossing. Valuation maps pointed out the need for distant signals a mile away - something I chose not to represent because of the lack of space. The California Railroad Commission documentation on the tower mentioned the 20 levers, which confirmed I’d accounted for all the devices around the real tower.

Track diagram for Fourth Street Tower in San Jose.

I also tried building an interlocking machine for the Market Street layout (though I haven’t ordered a kit for it yet.) The San Jose Market Street station had a switch tower at the east end of the station where the lines up to Oakland and down to Los Angeles diverge. For the Market Street layout, I again used valuation maps and photos to figure out the signals and switches that existed. There were no derails in the interlocking trackage. However, Modratec’s documentation did mention that sometimes particular switches would be forced to be set in a particular way to keep runaway trains out of the way of a chosen route, so there were some places where I could explicitly insist a switch had to stay pointed away from routes in use. (Specifically, I designed the interlocking so switch 6 would need to be pointed towards Oakland whenever a train was coming or going from the train shed.) For Market Street, I also had to decide which switches would be controlled by the interlocking. Southern Pacific timetables mentioned whistle signals to get access to nearby industries, suggesting these switches were under the tower’s control. A crossover just east of the station train shed, however, was outside of the track protected by the various signals according to the valuation maps, suggesting those crossovers were manually controlled. I left them out of the interlocking.

The Fourth Street tower was also complex because of the need for separate signal arms for each possible route through. I ended up making the easternmost signal (near "To LA") a three blade semaphore to control which diverging route would be chosen. I'd been curious why they needed a separate signal just west of switch 6; it provided a way to indicate whether the switch was lined for the mainline or the route into the yard without adding extra blades to the signals further east.

Once I had a handle on the track and signal arrangement, I started describing the interlocking in the SigScribe4 software. I drew the track diagram and placed symbols, connected up the levers, then set up the routes - about an hour of work now that I understand things.

Here’s some quick tips for using SigScribe4.

  • On a Mac, regular mouse clicks only do selection. You’ll need to do mouse clicks while holding down additional keys to do some of the actions. Select a square in the track diagram, and drag with the alt/option key down to draw a line. When you’ve selected a square in the track diagram (and see the multi-colored square), then shift-click on any of the eight cells to indicate the direction a track line should exit the square. Shift click in the center of the square to finish editing that cell.
  • Select a cell and press V repeatedly to show signal options for that cell, or H for derails, level crossings, and other non-signal options. For each signal, open the detail view (right click or command click and choose Detail View) and hit H and V to indicate the kind of semaphore blade in the signal or to show multiple blades when there are multiple routes available.
  • When connecting levers or routes, first select a lever, and then right click (or command click) to get the context menu and select “Connect” or “Define Route”. Connect all the switches associated with that lever or route (right click and choose "Connect" on each), then press the big button at the bottom of the screen to commit the change.
  • Make sure to define all levers and set their correct color (black for switches and derails, red for signals). If you need to change them, you're likely to lose all previous work.
  • Modratec mostly caters to English-style modelers, so it’s worth reading up a bit on either the Modratec website or british signaling website to understand their terminology.

Once I had a design, I tested it to make sure it worked correctly. I tried each route and double-checked the correct levers were locked and unlocked. I then saved out the model, checked the number of locking bars and levers needed, and got an estimate on price. Once I was ready to get the interlocking, I sent off an order and the file describing the model; Harold, the owner, sent e-mails about status, and let me know when the kit was on its way. Total time from order to kit arriving was about 6 weeks.

Assembling the Interlocking

I spent three days assembling the kit. The first day was doing the majority of the assembly. Most of the interlocking machine just needed to be assembled with screws; it all went together smoothly. The next two days were for making the locking mechanism: the tappet blades and locking bars. Finally, I completed assembly and made the track diagram to show which levers to throw.

The two non-trivial bits of work was the locking mechanism. An interlocking machine is set up so that conflicting movements can’t be made; it does this by mechanically blocking tappet blades (bars moved by the levers) with tappets in locking bars. The locking bars that set restrictions between levers are square bar-stock, and come pre-drilled where there would pegs to block the levers from movie. Brass rod needs to be pressed in and cut off to form the tappets, and filed flush with the top of the tappet blades. The tappet blades, controlled by each lever, are brass bar stock. Each tappet blade needs to be filed at the correct location to ensure the mechanism works properly. It’s straightforward but careful work; I was constantly assembling and testing to make sure I was filing in the correct location.

Next Steps

Although I’ve finished the interlocking machine, I still need to install it on the layout, attach it to signals, and tell crews how to use it.

The first step will be adding the model components; I’ll need signals to indicate when it’s clear to proceed, switch machines to control operation of switches under tower control, and derails to mark tracks that should not be crossed. The prototype signals were semaphore signals, located around 500 feet east and west of the crossing. Tall and spindly semaphore signals wouldn’t survive well in this area where people are constantly reaching in when switching; instead I’ll use dwarf lighted signals to indicate when the mainline is safe to cross. The derails are another important part of the interlocking; although I could try to build working derails, it might be easier to just add red LEDs near the track to indicate when the derail is set incorrectly.

The interlocking itself will be inset into the layout so it’s easy to reach, but won’t interfere with movement around the layout. It’s only six inches deep, so it should be easy to hide near one of the Del Monte buildings. I’ve had good luck with Team Digital’s programmable logic boards, though they all appear to have been discontinued. An Arduino board would be easy to program; each lever would throw one switch which would go to the Arduino; the Arduino could then control the signals and Tortoises.

Underside of interlocking machine with electrical switches added.

Once the interlocking is installed, switch crews will start having to work around the interlocking. Scheduled passenger trains will have it easy; the tower man would know the timetable, and could make sure that the signals were clear as the train approached. Freight trains would have a harder time without a schedule; on the real railroad, trains on the mainline would have to stop, whistle “one short and two long” to get the attention of the tower man, and get the switches set correctly. Crews on the drill track would probably need to stop, chat with the tower man, and get the switches thrown appropriately. Everyone would need to set the levers back before leaving. That leaves the WP trains; although I could automate it, I’ll probably just occasionally throw the levers to let a WP train through, preferably when a crew is about to switch in the area.


Thanks to Chuck who inspired me to build an interlocking machine, and shared stories and photos of the work he’d done restoring the interlocking machine at Santa Clara tower. I’ll miss him.

Information on the WP Tower from Jeff Asay's "Track and Time: The Operational History of the Western Pacific Railroad". I know I've seen more details in the California Railroad Commission decision allowing the WP crossings, but can't find references right now.

I have no connection with Modratec other than building this one kit.

Wednesday, February 12, 2014

Modeling the Weed-Infested Parts of the San Jose-Los Gatos Branch... With Photos!

W.P. Crossing, Los Gatos branch, 1940's?

Jack Burgess once explained how he started modeling the Yosemite Valley Railroad. “I went into the model train store, and they had two books on two California shorelines. I bought the Yosemite Valley one because it had more pictures.” That’s not an unusual way to start out modeling a specific railroad; usually when we start, we know only a bit about the specific railroad, don’t know where to turn for good photos, and don’t always have a good understanding of what the surroundings looked like or what trains ran there.

Luckily, we learn more over time. Jack ended up learning more about the YV than anyone else I can think of, and wrote a book about it. And me - well, I started out choosing the industries along the track based on which names sounded better, but every year I’ve learned a bit more about San Jose, the Los Gatos branch, and the canning industry.

And every year or so, I discover some picture that shows me a side of the railroad I’d never seen before. This photo, for example. I found this in a set of railroad photos on Flickr that were put online by the Barriger collection at the University of Missouri, shows the tracks in San Jose at the Western Pacific crossing. It’s a place that appears on my model railroad, so this photo gives me lots of details about what the area looked like, what the buildings looked like, and also what little details I ought to add to my model.

It's also a photo I thought I'd never find - an uninterrupted shot of some underused tracks cutting through the canneries and dried fruit packing houses on the edge of San Jose, showing more weeds than track. It's not a pretty shot, and it's not an action shot, but it shows a scene of San Jose that every distractible schoolboy saw on the way home from school - a photo few people would have ever taken. And it wasn't taken by a schoolboy, but a railroad executive.

Link to BIG VERSION of picture at Flickr.

The Industries:

Sack shed, Sunsweet Plant #6, Lincoln Ave.

It may not look like much, but this photo is filled with major industries. The corrugated iron fence and barbed wire top protects the Standard Oil depot. In the distance to the left, you see the roof of the large, wooden Sunsweet Plant #6 packing house on Lincoln Avenue - originally the George N. Herbert Packing Company. That little one story building in front of it? It’s listed on a 1950’s Sanborn map as “sack storage”, probably for Sunsweet. That packing house is the same era and the same rough construction as the J.S. Roberts packing house I’ve been building recently. The chimneys behind Sunsweet hint at the Contadina cannery, packing tomato paste.

1930 Sanborn Map, Lincoln Ave at Auzerais

On the right in the foreground is the sawtoothed former Virden Packing cannery; by this time, it may already be used for wine storage. It’s also got that loading dock on the side, also probably an SP siding. The masonry building on the other side of Lincoln Ave. would have been a cold storage building (I’d guess for pears for the canneries), and then in the far distance is the United States Products cannery, packing in glass for extra shelf appeal.

The Details:

Derail, WP Crossing

For detailing a scene, this is a beautiful photo. For example, the WP crossing was controlled by a switch tower through at least the 1930’s. That tower would have been just to the right of the scene You can see signs of its existence here - derails on both the left and right sidings / drill tracks to keep cars from rolling over the crossing and blocking the tracks. You can also see wood framing the ditch under the tracks which held the rods that controlled the derail.

If you look a bit further out, you’ll see cross bucks and a banjo crossing signal in the distance where Lincoln Ave. crosses the tracks. If I had any questions about appropriate signals for the busy Lincoln Ave. crossing, I now know. You’ll also see the searchlight signal a bit further out, indicating that the SP finally did put signals along the Los Gatos branch. There’s finally all the little details - hip-high weeds on the left side of the tracks, and fewer weeds on the right side. The tracks are set right in the dirt - all those lessons about raising main tracks to make them look better maintained is a lot of bunk, at least for San Jose. The railroad’s telephone poles and signal poles frame the shot, reminding me of another detail to add. Then there’s the random debris - posts sticking up out of the weeds, the canvas in a pile on the side of the tracks, the scrap wire just past the WP tracks.

Switchman's Shanty, Lincoln Ave., San Jose

And if you look past that signal in the middle foreground, you’ll see a little shack on the right side of the tracks - that switchman’s shanty that showed up on the Dome of Foam engineering plans.

And if I needed ideas about my buildings, there’s lots of great details that would apply, whether here or in another part of California: the corrugated iron fence around Standard Oil. The weathered low building for the empty prune sacks, with its big freight door and lots of windows high up. The packing shed with random gables and skylights poking out here and there.

Even the locomotive’s position gives me hints about how the tracks were used. None of the maps I had showed whether there was a track in that location, so I assumed there might be an interchange with the Western Pacific. Locomotive 1235 is sitting on a track in the right place; it might be an interchange track, or it might only be a spur for the Interurban railroad yards up on San Carlos Street. The photo also tells me I ought to be switching the industries along this track with a similar tiny 0-6-0.

Photos like these are waiting for you to find them. I couldn’t have imagined finding a photo like this when I started modeling the Vasona Branch, but I keep discovering photos like this. Each photo helps interpret the purpose of the different railroad tracks, identify the changes to the industries along the track over time, and hint at the set-dressing details that will make my models more realistic.

Your favorite railroad probably has photos like this - maybe you’ll see them in a book, or find some random photographer who snapped a photo of your favorite bit of track. (For example, if you model 1971-era Oakland, check out Nick deWolf’s photos of San Francisco and Oakland in the summer of 1971, which has some photos of local scrapyards and industries.)

The Barriger collection on Flickr is also huge, with a lot of very non-traditional photos of empty tracks, industries, and stations. Those photos also cover many railroads including the Western Pacific and Southern Pacific.

But I know there’s a bunch of photos out there that you’d love to find; just keep looking.

[Original photo from the Barriger collection at the University of Missouri; they're being quite generous to share the photos on Flickr, so go look at them and add comments explaining where these photos are. The Barriger collection is a set of photos taken by a railway exec in the 1930's and 1940's; check them out for some great discoveries.]